Trimech-Main-Site-Group-Navigation Trimech-Main-Site-Group-Navigation Trimech-Main-Site-Group-Navigation Solid-Solutions-Group-Navigation Javelin-Group-Navigation Solid-Print-Group-Navigation 3DPRINTUK-Group-Navigation Trimech-Enterprise-Solutions-Group-Navigation Trimech-Enterprise-Solutions-Group-Navigation Trimech-Advanced-Manufacturing-Group-Navigation Trimech-Staffing-Solutions-Group-Navigation
With over 35 years of experience, the TriMech Group offers a comprehensive range of design, engineering, staffing and manufacturing solutions backed by experience and expertise that is unrivalled in the industry. The TriMech Group's solutions are delivered by the divisions and brands shown here, use the links above to visit the group's websites and learn more.
x
Search

Circular Patterning

Tuesday September 1, 2015 at 9:56am
In this blog I will be explaining how to use the circular patterning tool. Patterning can significantly save you time by enabling you to copy and replicate features that you have already done.

For a circular pattern, you must define the axis of revolution, the total revolution angle, and the number of copies to make.

Create a sketch on a circular face that need to be replicated ensuring that that the sketch is fully defined.
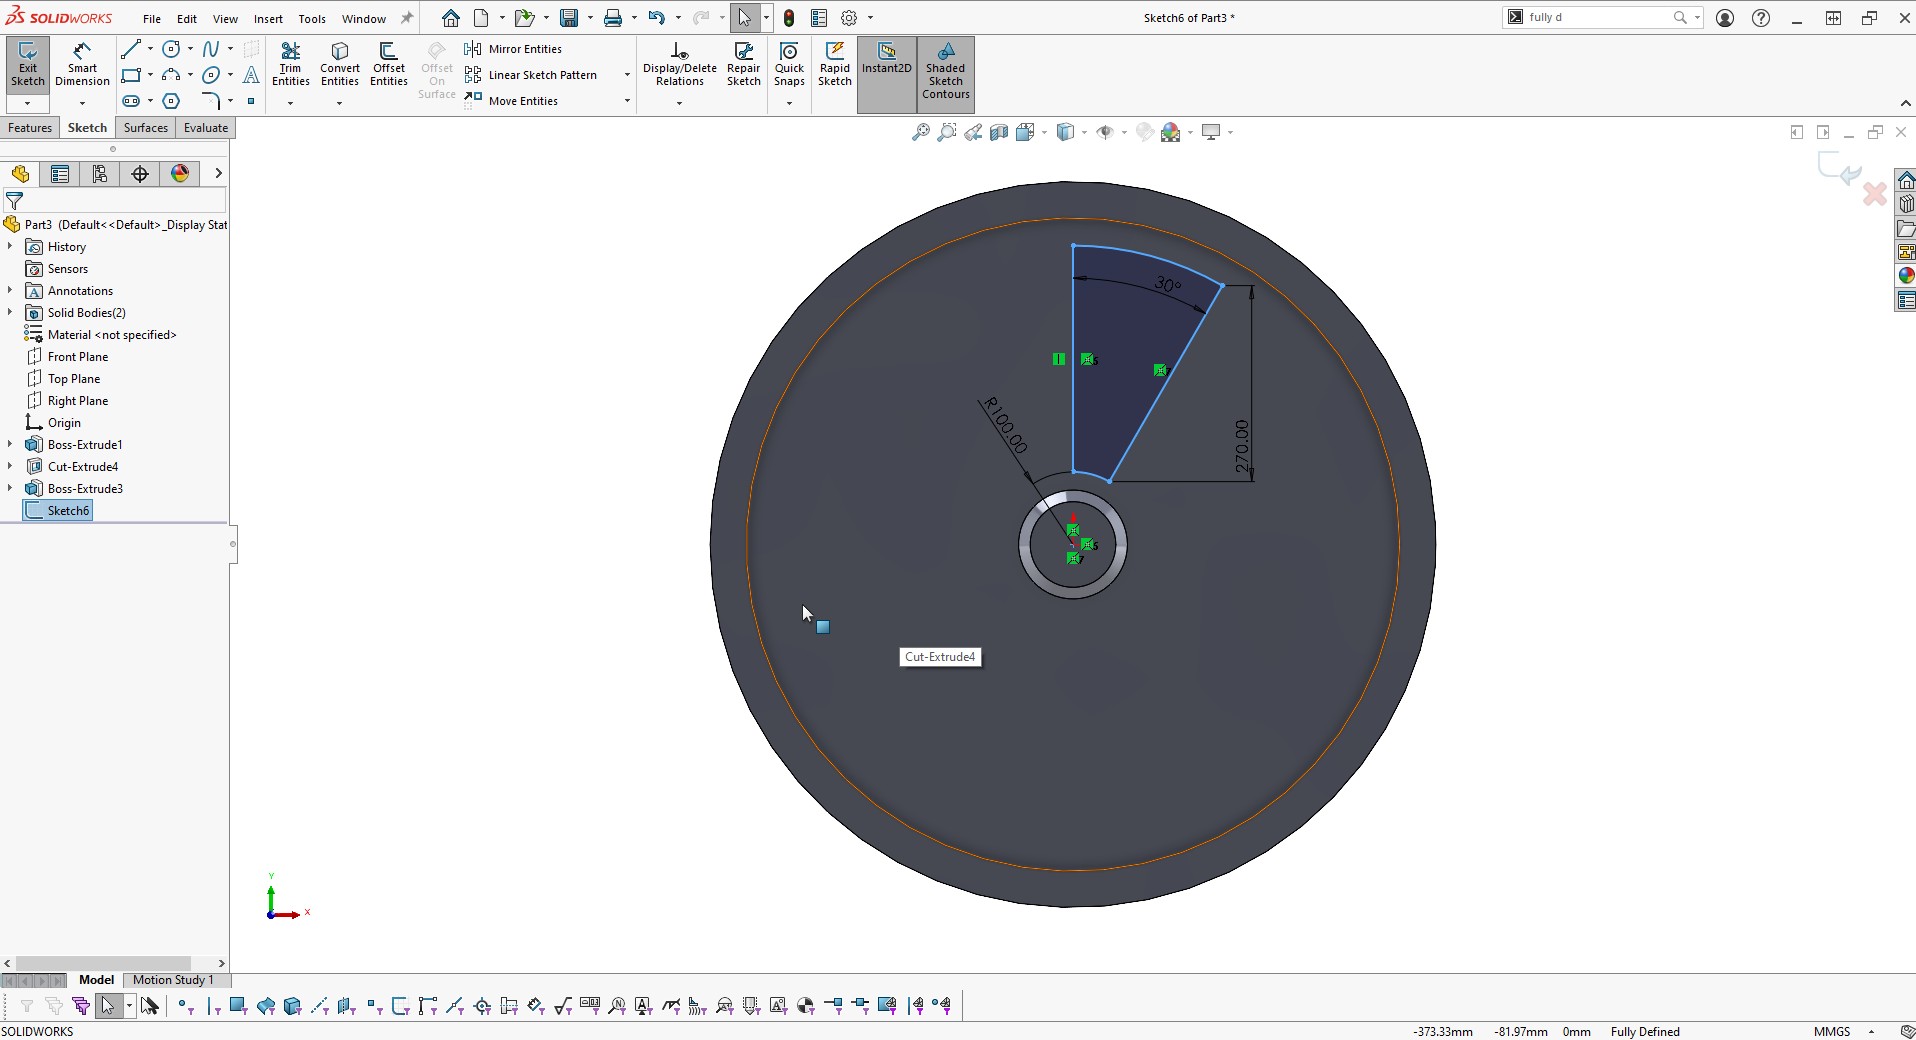
The sketch was then extruded cut through all as shown below.

Click the ‘Circular Pattern’ tab on the Features toolbar as shown above or Insert > Pattern/Mirror > Linear Pattern
></p> <p>
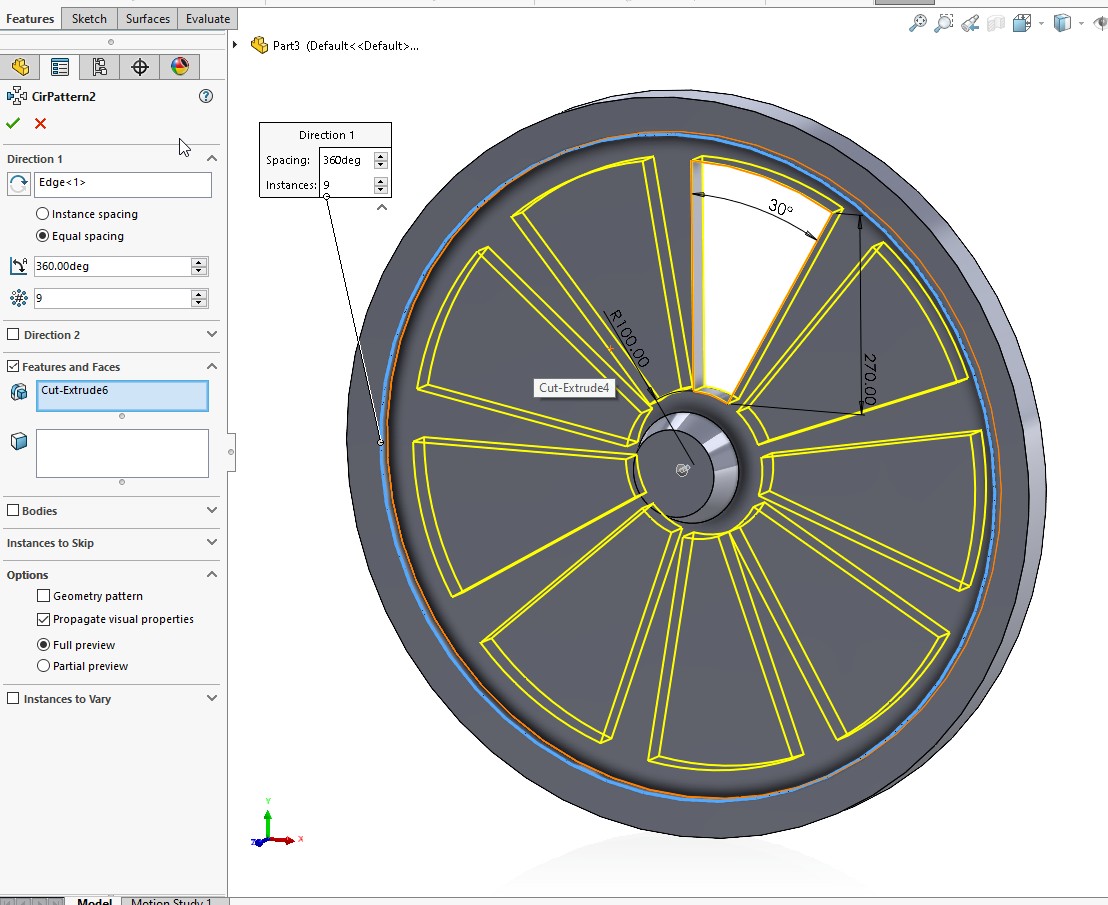
You should see that in property manager that the axis space
is highlighted. Select the circular edge (highlighted in blue), this selects the axis in
which the feature is going to be patterned. You can now make your pattern
TWO different ways. If “equal spacing” is checked simply specify the number of
patterns you want. Or you can uncheck “equal spacing” and specify the number of
patterns as well as the angle between them. Click “Equal Spacing” and make 9
copies. Click OK to exit property manage. You should also be able to see a
preview of the pattern that will be created, if not, just select ‘Full preview’
or ‘partial preview’ under the Options tab.
 
</p> <p>The resultant solid part with circular pattern created would
be as shown in below image.
</p> <p><img src=

You should see that in property manager that the axis space is highlighted. Select the circular edge (highlighted in blue), this selects the axis in which the feature is going to be patterned. You can now make your pattern TWO different ways. If “equal spacing” is checked simply specify the number of patterns you want. Or you can uncheck “equal spacing” and specify the number of patterns as well as the angle between them. Click “Equal Spacing” and make 9 copies. Click OK to exit property manage. You should also be able to see a preview of the pattern that will be created, if not, just select ‘Full preview’ or ‘partial preview’ under the Options tab.  The resultant solid part with circular pattern created would be as shown in below image.


Written: September 2015Updated: June 2021

Related Blog Posts

How to Move a Sketch in SOLIDWORKS
If you need to move a sketch in SOLIDWORKS, then you may find that it can be surprisingly tricky! But after you learn this tip, you'll never need to worry about moving a sketch again!
The Best Hardware for SOLIDWORKS in 2025
SOLIDWORKS 2025 is here! So it’s important to check in on your hardware and make sure it will serve you well and most importantly, that it can run SOLIDWORKS 2025 happily.
A Step-by-Step Guide to Adding Dynamic Previews to
Learn how to create 3D Documents and generate dynamic form previews in DriveWorks.

 Solid Solutions | Trimech Group

MENU
Top